Baked Turdilli : Recipes At My Table

Baked Turdilli 

Baked Turdilli

Baked Turdilli are a healthier version of our traditional treats.  When I go home to Sault Ste. Marie, Ontario for Christmas, mom and I will make the traditional ones.  These are an easier version, but with good taste.  The original recipe requires that you deep fry these little dough balls which turn out a bit like a donut.

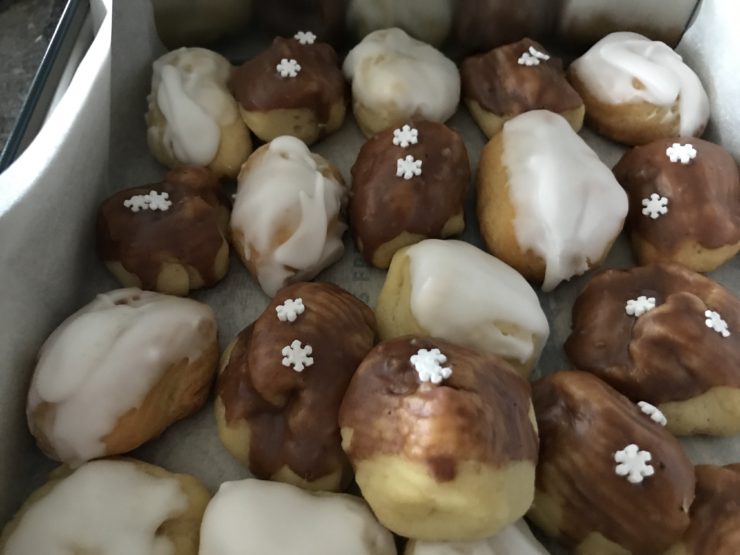
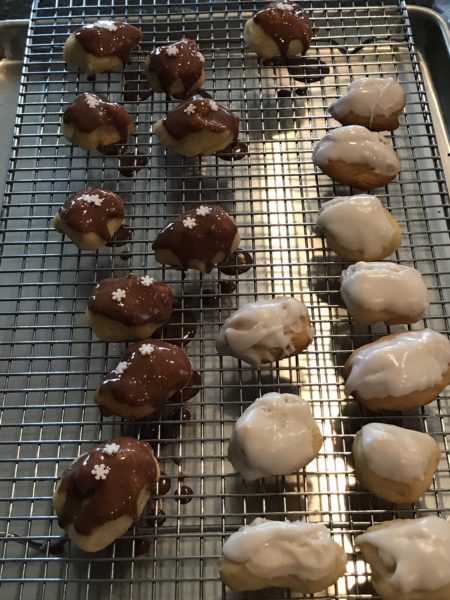
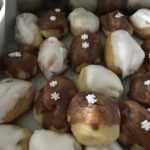
Turdilli originated in Calabria, but Italians everywhere make them.  They vary in size.  I like them smaller so that I can taste the different kinds.  I put white icing sugar and Sambuca on some and cocoa, icing sugar and Baileys on others.  They honey ones are my favourite, and sometimes I pile them like a mountain.  When I make a mountain of honey turdilli, I make them smaller.

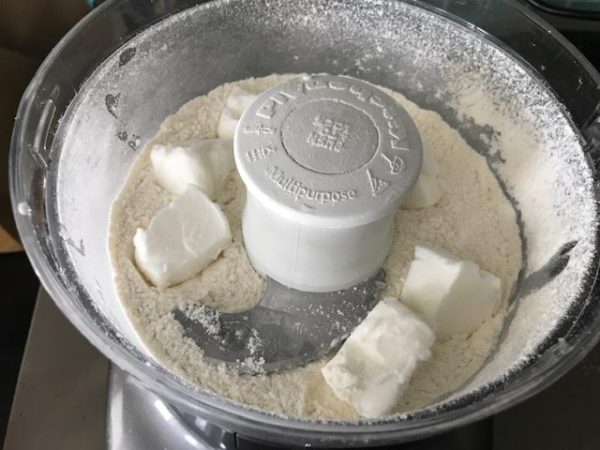
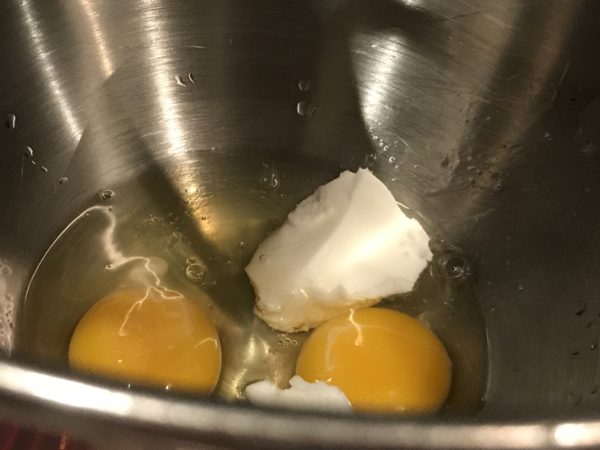
First I beat the eggs and the crisco shortening.

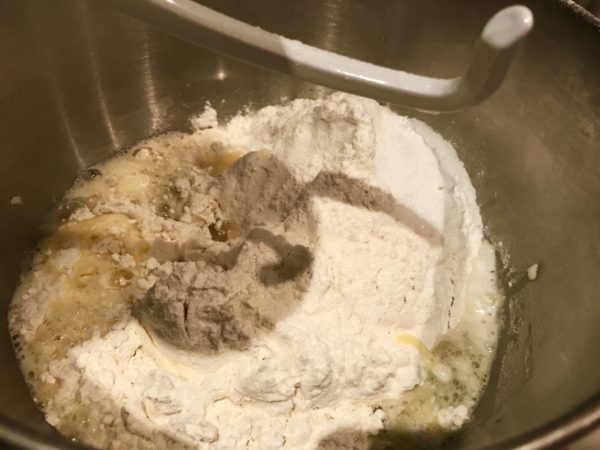
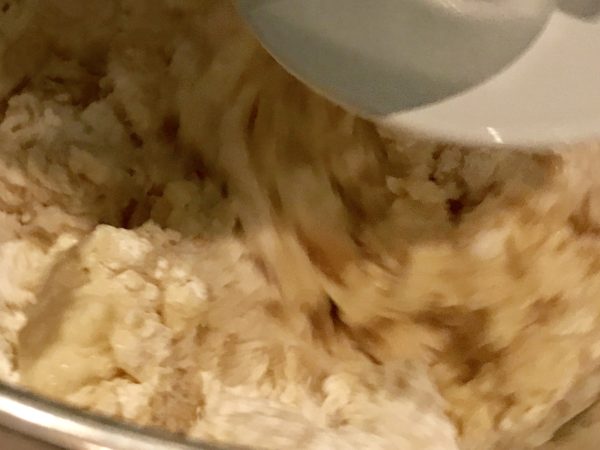
Then I add the remainder of the ingredients and bring them together with the dough hook attachment.

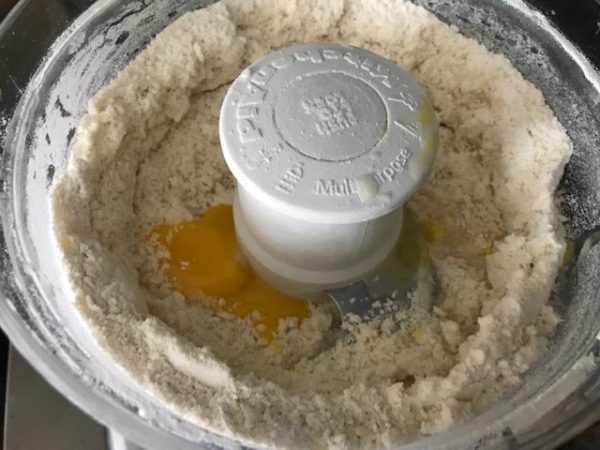
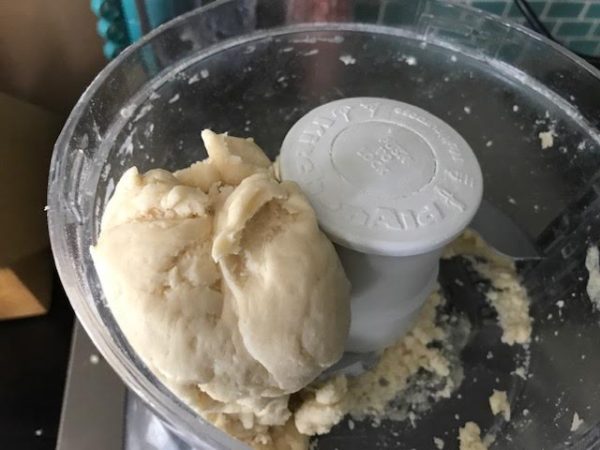
The dough comes together.

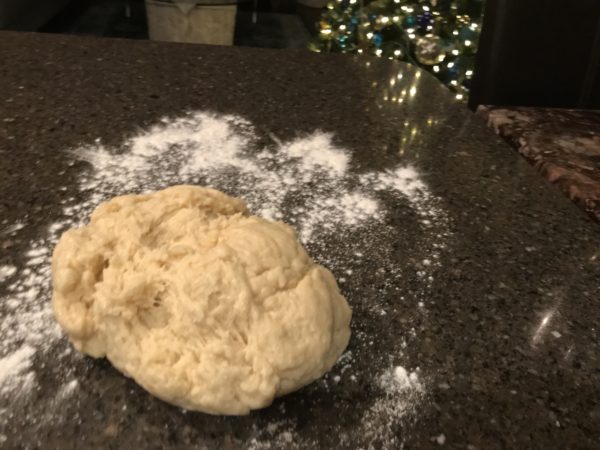
It pulls away from the bowl and is ready for the counter.

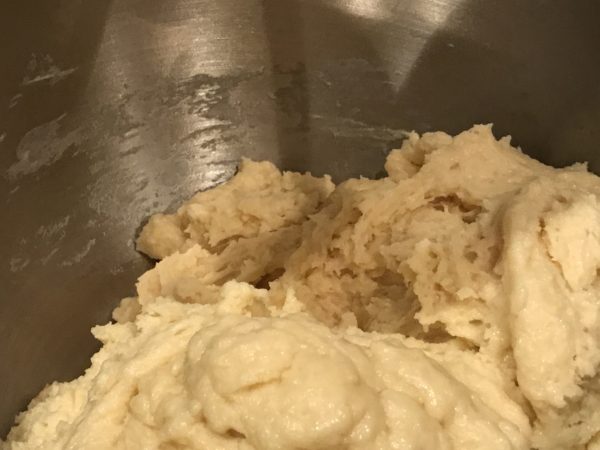
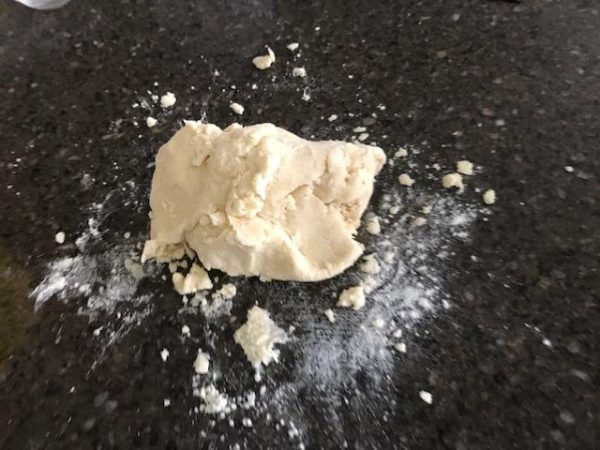
The dough should be pliable and not sticky.

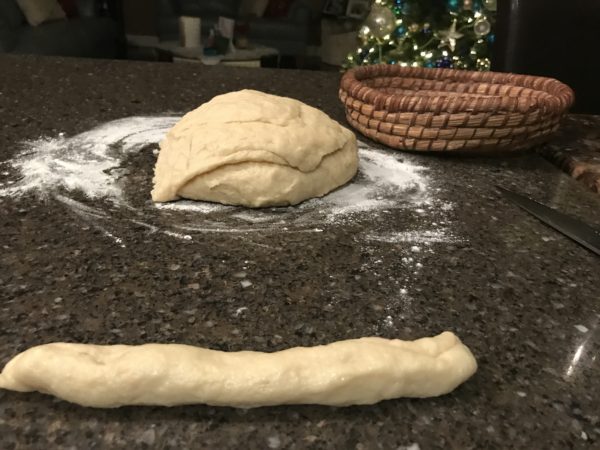
I cut pieces and roll them into 1 inch thick ropes and then choose your size.  Mine were cut into 1 inch pieces.  If you want to make a mountain, cut into 1/2 inch pieces and of course you can make them larger.

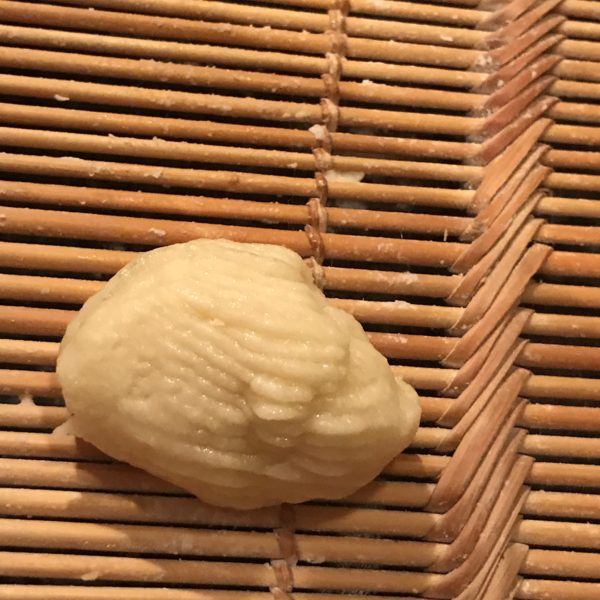
You want to put ridges in them so that the honey sticks. If you don’t have the special basket, you can use a fork.

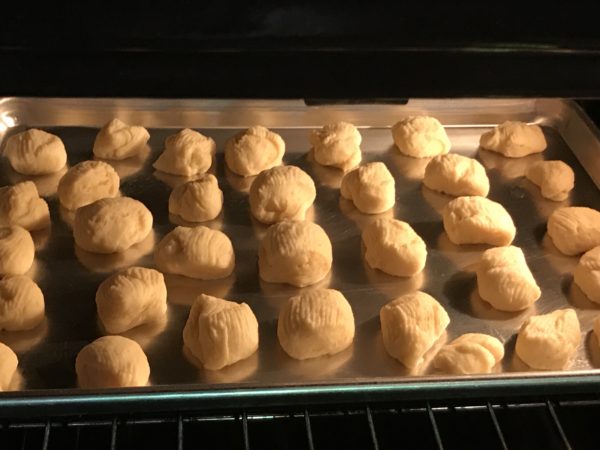
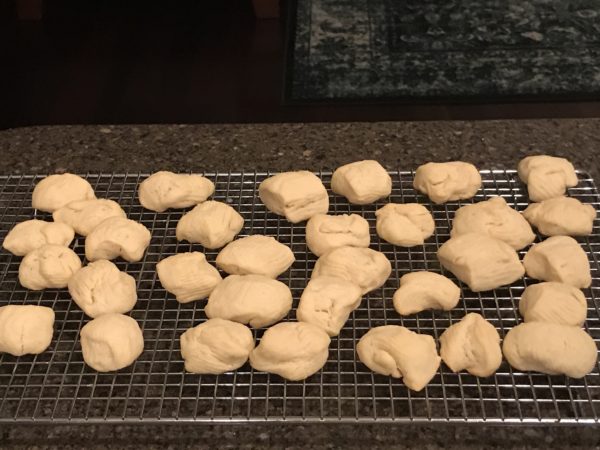
You know that I love to peek into the oven.

Let them cool when they come out of the oven.
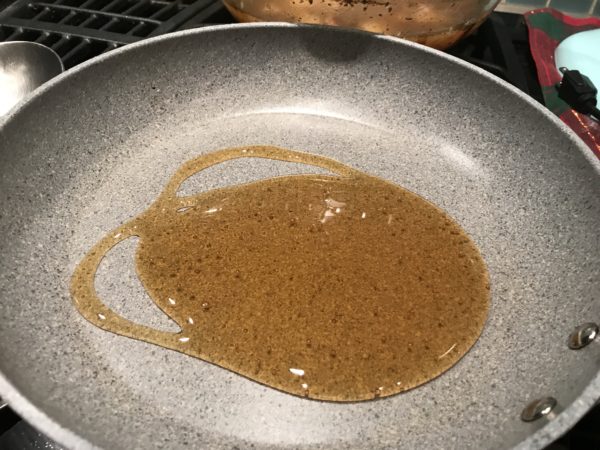
Melting the honey.

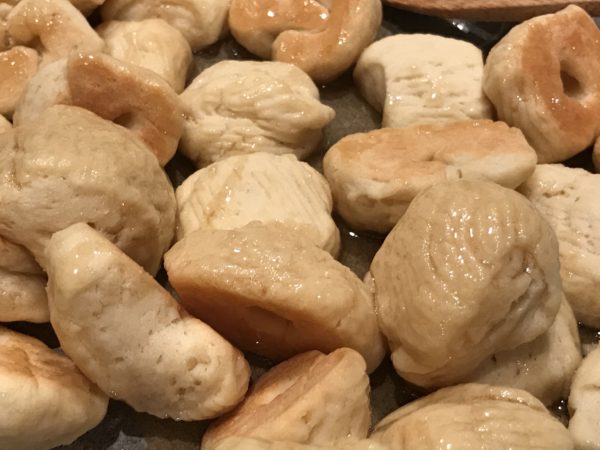
In they go and toss them around.

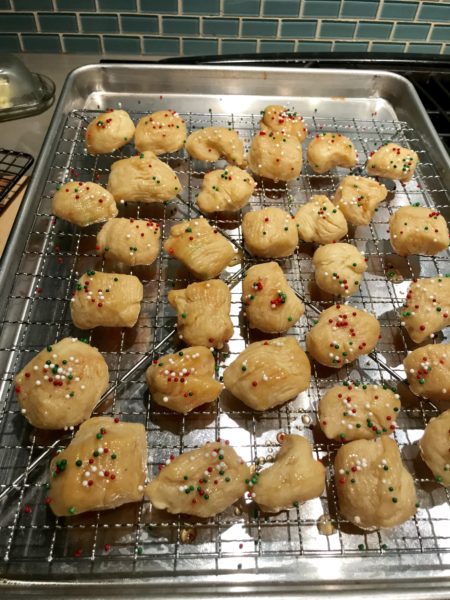
Put them on a rack onto a cookie sheet and sprinkle to decorate.
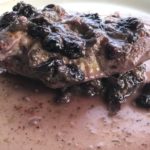
These one are iced.

Baked Turdilli 

Baked Turdilli are traditional Calabrese Christmas cookies. 
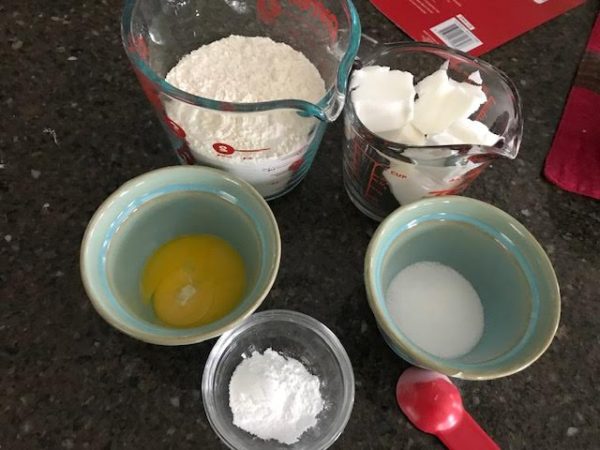
Course Dessert
Cuisine Home Cooking in Canada, Italian
Keyword Baked Turdilli
Prep Time 15 minutes
Cook Time 25 minutes
Total Time 40 minutes
Author Renata Solski

Ingredients

The Turdilli

  • 2 eggs
  • 2 tsp Crisco Shortening
  • 1 cup water
  • 1 cup oil
  • 4 cups flour
  • 2 tbsp baking powder
  • 1 tsp salt

The icing

  • i cup icing sugar
  • 1 tbsp Baileys, Sambucca or your choice of flavouring

The honey

  • 1 cup honey
  • sprinkles optional
  • white sugar optional

Instructions

The Turdilli

  1. Beat the eggs and shortening first.

    Add the water and oil.

    Next put in all the dry ingredients.

    Mix with dough hook.

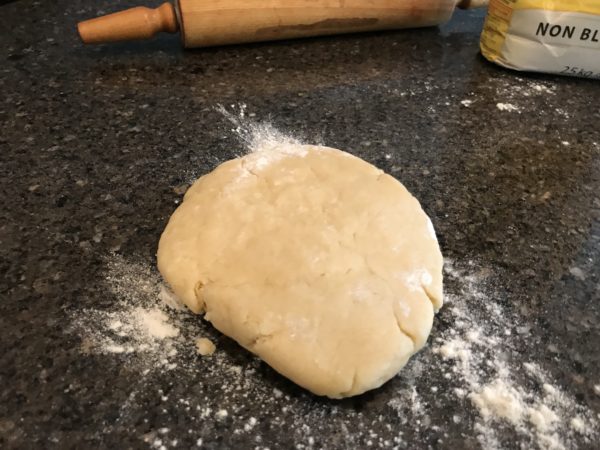
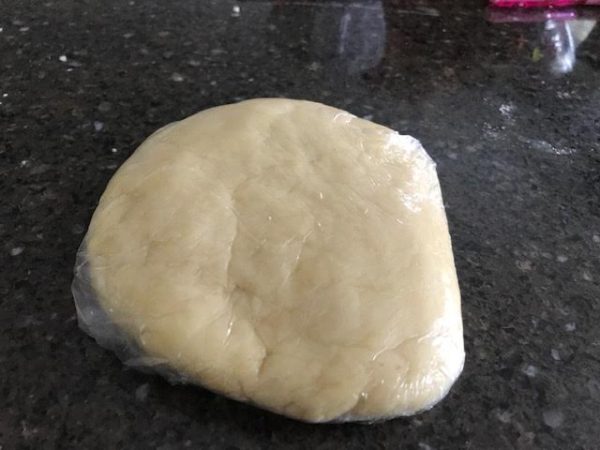
    Roll onto counter and knead a few times.

    Cut large pieces and roll into 1 inch ropes.

    Now, cut to desired lengths.

    Place on an ungreased cookie sheet.

    Bake at 400 F for 10 minutes.

    Lower oven to 350 and cook a further 10 to 15 until golden.

    Place on a rack to cool.

    Ice and decorate as desired.

The honey coating

  1. Place the honey in a pan until it bubbles.

    Remove from heat and toss in turdilli.

    Coat all the turdilli in honey. 

    With a slotted spoon, place turdilli on a rack.

    Garnish with sprinkles or plain white sugar. 

    They are also good with just the honey.  

Recipe Notes

To make chocolate icing sugar add 1 tbsp of cocoa to the mixture. 

Icing should be thin.  


Paige’s No Fail Pie Crust

Paige’s NO Fail Pie Crust

Paige’s No Fail Pie Crust came about after watching my daughter-in-law Paige make pies on Thanksgiving. While visiting with her, I watched her struggle with a pie crust and I could feel her anguish.  We have all been there creating the pie crust that won’t come together and falls apart. We have all done the patch-work on the plate. Paige, this one is for you.  I came home and with a vengeance created this recipe for you.

I share with you all Paige’s Pie crust that is No-fuss and works. It took me some trial and error, but this crust stands up to a lot. My one dilemma was the question of whether to pre-bake the crust. The experts agree that if you are looking for colour, texture and flavour the answer is yes.  I leave this one to the experts until my experiments continue.  

This Italian did a lot of research on pies and this is the best article I found: https://www.nytimes.com/2013/07/03/dining/pie-debates-the-experts-weigh-in.html

I did experiment with sugars; if you like replace the white sugar with coconut sugar for a different taste and more colour.  You can also leave the sugar out.

I gather the ingredients.

Pulse the flour, sugar and baking powder first.

Pulse until it looks like little peas and then add egg yolk and 2 tbsps cold water.

Keep adding cold water until the dough pulls away from the blades and forms a ball.

The dough hits the counter.

Turn it out onto the counter and knead until it comes together.

Wrap in plastic and refrigerate for at least 2 hours.  It is better if it sits overnight.

This is such a smooth dough.  Here it is  ready for the oven.

Today Paige’s Pie Crust made a Holiday Chocolate Pecan Pie which will be on the website soon.

Holiday Pecan Chocolate Pie: recipes at my table

We also made a lemon custard pie.  Look at the flakiness of this dough.

I also made a pumpkin pie with this crust.

Paige's Pie Crust

Paige's Pie Crust cuts out the anguish in baking. 

Course Dessert
Cuisine Home Cooking in Canada, Italian
Keyword Paige's Pie Crust
Prep Time 10 minutes
Cook Time 15 minutes
Total Time 25 minutes
Author Renata Solski

Ingredients

  • 1 1/2 cups flour
  • 1 tsp baking powder
  • 1 tbsp sugar
  • 1/2 cup shortening I used Crisco
  • 1 egg yolk
  • 2-8 tbsp cold water

Instructions

  1. Sift the flour and and the baking powder.

    Put into a food processor and pulse.

    Add the sugar and pulse.

    Cut the shortening into cubes and add to the food processor. Pulse a few times.  

    Add the egg yolk and 2 tbsp of water.

    Pulse again.  Keep adding water 1 tbsp at a time, until the dough comes away from the blades and forms a ball.

    Turn the dough out onto your counter and knead briefly.

    Wrap the dough in plastic and place in refrigerator for at least two hours.  Overnight is best. 

    When ready roll out the pie dough by lightly flouring your counter and rolling pin.

    Begin by flattening the round and then rolling out from the centre.  Flip the dough, lightly flour and continue.

    If your pie will spend minimal time in the oven, then pre-bake it before filling.

    To pre-bake the shell, preheat oven to 375 F.  

    Pierce the pie shell with a fork and put a piece of parchment paper over it.

    Fill with dried beans and set in the oven for 15 minutes.

    Reduce heat to 350 after filling the pie.  

Recipe Notes

This recipe may be doubled without changing the consistency.

The dough may stay in the refrigerator overnight. 

Pre-baking creates a flakier pie crust. 


ONE DISH CHICKEN ON THE GRILL WITH BLUEBERRIES Recipes at my Table

Barbecued Blueberry Chicken

Barbecued Blueberry Chicken

Barbecued Blueberry Chicken lets you enjoy family and friends and still bring them together to the table with ease.  The dish makes its own sauce with a sweet and tangy flavour.  Your kids will love this too. The foil packages lower the cooking heat and keep moisture in the chicken.  This method is similar to a poaching method.  The chicken is moist, succulent and this method prevents overcooking.

I love packets because they are like little surprises.  My grandson loves to open any package and he is sure to lick every drop of this sauce. This sauce was so good that my husband dunked bread in it.  We served the chicken with lemon rice and grilled asparagus.

Blueberries are natural antioxidants; they serve a powerful role in a healthy lifestyle. I love to eat them fresh in a bowl with nothing on them.  I add them to cereals, muffins and now I started to look at other recipe possibilities.  https://www.rd.com/health/healthy-eating/blueberry-health-benefits/

mix the dressing in a bowl.


The blueberries are from the local farmer’s market.

Brush the dressing on the chicken.

The blueberries go into the packets.

One Dish Chicken on The Grill Recipes at My Table

Love these little foil packets for the grill.

The chicken was delicious and tender; the blueberries made it fruity and succulent.

ONE DISH CHICKEN ON THE GRILL WITH BLUEBERRIES Recipes at My Table

Barbecued Blueberry Chicken

Bring your family and friends together with the ease of this recipe.  

Course Main Course
Cuisine Home Cooking in Canada
Keyword Barbecued Blueberry Chicken
Prep Time 10 minutes
Cook Time 30 minutes
Total Time 40 minutes
Servings 4
Author Renata Solski

Ingredients

  • 4 boneless skinless chicken breasts
  • 2 cup blueberries
  • salt and pepper to taste
  • 1 tbsp garlic plus seasoning
  • 1 tsp Dijon Mustard
  • 2 tbsp lemon juice
  • 2 tbsp olive oil
  • 2 tbsp pure maple syrup
  • 4 scallions slice ( garnish)

Instructions

  1. Salt and pepper the chicken.

    Mix all the ingredients except the blueberries and scallions. This makes a thick dressing. 

    Tear off pieces of heavy duty foil.  18 X 18 

    Visit this recipe to review foil packet making : https://recipesatmytable.com/vegetable-sausage-foil-packs/

    Brush chicken on both sides with the dressing.  Drizzle the remaining dressing evenly amongst the four packages.

    Place one chicken breast per packet.

    Place 1/2 cup of blueberries per package.

    Grill over direct medium/low heat for 25 to 30 minutes.  The cooking time depends on the size of the chicken breasts.  

    Open packets and dress with fresh scallions. 


Tempting Italian Pizza Buns

Tempting Italian Pizza Buns

One of my favourite panini in Italy is a soft roll stuffed with meats, cheese and other goodies.  I like it because you can buy it and carry it down the street; I guess they would be the equivalent of a pizza pocket.  These Tempting Italian Pizza Buns can be stuffed with anything you like.  Whatever you do, don’t put any tomato sauce inside; I use marinara as a side for dipping.  In the video I stuff them with capicollo (pork cold cut) and cheese. My favourite are stuffed with rapini, sausage and onions.  Everything is pre-fried and then it becomes the little treasure inside. Try to use two items or at the most 3 inside these buns.  You can put them in the refrigerator, and they can be frozen.  They make the perfect all-in-one sandwich.

The Inspiration behind this bun

My nonno Salvatore loved fried rapini with sausage; in fact, most Italians love this dish and it is on many lunch menus.  The buns stuffed with rapini, sausage and onions that I make are a tribute to nonno Salvatore. When I am in Italy, I enjoy the buns stuffed with ham and cheese; and so, the idea for this recipe came about.  Sometimes I would stop by my favourite bakery in Cefalù and pick the stuffed buns up on the way to the beach and they became a mid-morning snack. Today, I am stuffing these pockets with capicollo and cheese because not everyone in my family likes rapini as it is an acquired taste.  You can also substitute other vegetables.  I like fried peppers, onions and mushrooms in this pocket. Remember not to use anything to soggy in the filling, or the bun won’t retain its shape.

Making your own bread dough is easy. Don’t be intimidated. It is simply a combination of flour, water, yeast, sugar and it’s done. I love this dough because it doesn’t need to rise. If you don’t like to make your own dough get some frozen pizza or bread dough at your local bakery.  It’s all good!!

Blanche some rapini and fry it.

Fry up some onions to golden brown.

Take two Italian sausages and remove from casings and fry up with the onions.

Rapini, onions and sausage ready for the buns.

Tempting Italian Pizza Buns

Pockets of flavour!

Course Main Course
Cuisine Italian
Prep Time 1 hour
Cook Time 25 minutes
Total Time 1 hour 25 minutes
Author Renata Solski

Ingredients

The Filling

  • 1 bunch rapini blanched and fried
  • 2 Italian sausage links removed from casings
  • 2 large onions thinly chopped fried

The Buns

  • 1 1/2 cups warm water
  • 1 tbsp quick rise yeast
  • 1 tbsp sugar
  • 3 cups flour
  • 1 tsp salt
  • 1 tbsp olive oil for brushing buns
  • grated parmesan cheese sprinkle on buns

Dipping sauce

  • Marinara Sauce

Instructions

The filling

  1. Clean and wash the rapini.  Cut and discard all the hard long stems. Place the rapini in a pot of boiling salted water for 5 minutes.  Remove to a cold bath.

    Take the sausage out of the casings and break it up.  Fry until golden brown. Remove from the pan.

    In the same pan add 2 tbsp of canola oil and fry onions. Remove and mix into sausage.

    Drain the rapini well. Cut up into small pieces.  Add 2 tbsp olive oil to frying pan and fry the rapini.  

    Add the rapini to the onions and sausage and mix well.  Set aside


The Buns

  1. Preheat oven to 425 F.

    Combine the warm water with the yeast and sugar. Let it sit for 5 minutes.

    Put the flour and salt in a mixer.

    Pour the liquid into the mixer at low speed.

    The dough will form a ball. 

    Put it onto a floured surface and knead for about 3 minutes.

    Let the dough rest for 5 minutes. 

    Cut dough into two parts and each part into six.

    Form circles.  I use the bottom of a glass to press down the dough.  (see video)

    Fill each circle with your choice of ingredients.  Don't put too much in the centre.

    Pinch the dough together, shaping each piece into a ball by pulling the edges under.

    ( see video)

    Put on a large pan lined with parchment paper.  

    Brush with olive oil and sprinkle with parmesan cheese. 

    Let the buns sit on the pan for 5 minutes.  

    Cook for 25 minutes.  


Recipe Notes

Keep the stuffing ingredients simple.  You can use pepperoni, peppers,mushrooms,etc.  Try to keep it to a maximum of 3 ingredients per bun.


Rapini and sausage Pizza Bun.